Views: 141 Author: Site Editor Publish Time: 2026-10-06 Origin: Site


Receiving a sample is the defining moment in the procurement process for Pilates studio owners and distributors. A visual inspection is never enough to predict long-term performance. You cannot rely on aesthetics alone to guarantee safety and durability. Differentiating between high-quality equipment and subpar manufacturing requires a standardized stress-testing framework. Evaluators must rigorously test biomechanical alignment, material density, and structural integrity under active loads. We need this systematic process to confidently approve a sample for bulk purchase or studio rollout. Examining a product in action reveals its true quality. It exposes structural weaknesses invisible to the naked eye. Clients trust you to provide safe, effective workout tools. Testing ensures they receive exactly what they need. Your business reputation depends on the durability of your studio gear. Proper sample analysis prevents costly future replacements. You will learn specific testing criteria to apply immediately. We will explore material density checks, ergonomic assessments, and supplier vetting strategies.
Evaluate samples against strict spine corrector specifications, focusing on material density, dimensional accuracy, and base stability.
Modern variations, such as the heavy duty epp detachable arc spine, require specific tests for joint modularity and shape retention.
Anatomical testing must account for varying user heights and weights to ensure universal biomechanical support.
A successful sample evaluation must also include vetting the spine corrector supplier for mass-production consistency, quality control, and compliance.
Every equipment purchase carries inherent financial and reputational risks. Adopting poorly manufactured equipment often leads to disastrous outcomes. Client injury remains the most severe consequence of equipment failure. Rapid material degradation also damages your studio prestige. You must reframe sample evaluation as a crucial risk mitigation strategy. First impressions often deceive buyers. A beautiful finish might hide weak structural joints. We must look beyond the surface level.
You must define the specific use case before testing begins. Different environments demand entirely different performance metrics. Consider where the equipment will live permanently. Answer these questions early in the process:
Will you use the unit for clinical rehabilitation?
Will it endure high-traffic group studio classes daily?
Is it intended for at-home retail consumers?
Rehabilitation settings require maximum stability and precise anatomical support. Group classes demand extreme durability and easy maintenance. Retail products prioritize lightweight portability and easy storage. Your evaluation framework must shift based on these specific needs. Move past simple visual approvals. You need to assess maximum load capacity dynamically. You must judge the tactile feedback of the upholstery. Finally, you must verify overall supplier reliability.
Best Practices: Always test a sample in the exact environment of its intended use. Do not test a commercial studio sample in a quiet office. Put it on the actual studio floor. Let your most experienced instructors handle it daily.
Common Mistakes: Approving a sample based on photos alone is a critical error. Skipping the physical stress test guarantees future equipment failures.
Material density dictates both comfort and longevity. You must understand how different foams behave under pressure. Memory foam, EVA, and EPP offer distinct tactile responses. We measure foam firmness using Indentation Force Deflection (IFD). High IFD values indicate firmer, more supportive materials. Press your thumb deeply into the foam apex. It should resist the pressure firmly. The foam must rebound instantly upon release. Sluggish rebound indicates low-quality cellular structure. It will flatten quickly after repeated client use.
Traditional models use wood and vinyl construction. You must inspect the hidden underside of these units. Check the staple integrity along the inner edges. Staples should sit flush against the wood tightly. Protruding staples pose severe laceration risks to users. Measure the vinyl thickness precisely. Thin vinyl cracks easily under constant stretching. Inspect the seam stitching meticulously. Double-stitched seams resist tearing far better than single-stitched alternatives.
Modern modular designs introduce new testing variables. When you evaluate a heavy duty epp detachable arc spine, look closely at joint modularity. You must check the friction between interlocking parts. Inspect all locking mechanisms closely. They must never separate during dynamic movements. A secure lock prevents sudden client injuries. Assemble and disassemble the unit twenty times. The joints should remain tight and secure. Any looseness indicates poor manufacturing tolerances.
You must also measure dimensional tolerances accurately. Measure the sample against standard industry schematics. You must confirm strict spine corrector specifications before approval. Measure the overall length, width, and arc radius. Ensure it fits your standard studio storage footprint. Oversized units disrupt floor plans. Undersized units fail to support taller clients adequately.
Material Type | Primary Benefit | Vulnerability | Testing Focus |
|---|---|---|---|
Wood & Vinyl | Traditional aesthetic, heavy base stability | Upholstery tearing, wood warping | Staple depth, seam strength, wood finish |
High-Density EVA | Excellent cushioning, moderate weight | Surface gouging from sharp objects | Rebound speed, surface friction |
EPP Foam | Ultra-lightweight, extremely durable | Lack of traditional visual appeal | Joint locking security, shape retention |
Equipment exists to support human movement safely. If the biomechanics fail, the product holds no value. We must test the ergonomic response rigorously. Start your assessment using the Apex Test. This test assesses the maximum height and curvature of the arc. The curve must support the natural lumbar spine perfectly. It should facilitate deep extension gently. It must never force the user into painful hyperextension. An overly steep apex compresses the lower back dangerously. A flat apex provides insufficient opening for the chest.
Next, evaluate pelvic stabilization features. Focus heavily on the slope and the step. The step is the flat lip at the base. It must anchor the pelvis comfortably during complex movements. Practitioners perform roll-overs and side-bending frequently. The step must prevent sliding during these exercises. A hard, unpadded edge causes severe bruising on the tailbone. Ensure the transition between the step and the barrel feels seamless.
You must conduct a thorough Inclusivity Stress Test next. Human bodies vary wildly in size and proportion. A good sample accommodates a wide demographic seamlessly.
Gather instructors of varying physical dimensions.
Include a practitioner around 5'2" in height.
Include another practitioner around 6'2" in height.
Have them execute a full sequence of core movements.
Document their feedback regarding ergonomic fit and comfort.
Taller users often struggle with insufficient barrel length. Their heads may hang off the edge uncomfortably. Shorter users might find the apex too high. They may struggle to reach the floor during stretches. The sample must offer universal biomechanical support. If it fails this test, request a redesign immediately. Customizing dimensions pre-production saves significant trouble later.
Best Practices: Always film the biomechanical testing sessions. Reviewing the footage helps identify subtle alignment issues. You might notice awkward neck positioning missed in real time.
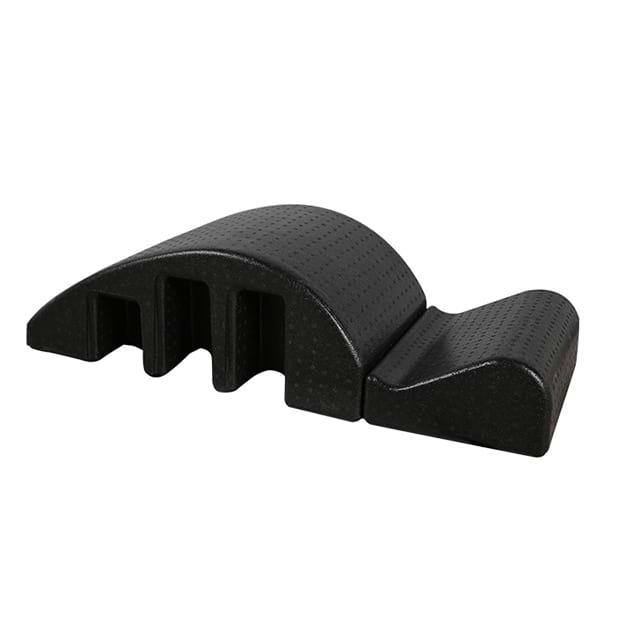
You cannot judge durability by looking at a stationary object. You must push the sample to its absolute limits. Dynamic load testing simulates months of wear in days. Your goal is to break the sample during this phase. If it survives, it passes. Assign two heavy-set instructors to use the unit aggressively. Have them perform repetitive step-ups on the barrel apex. They should execute heavy loaded extensions repeatedly. Listen closely for any creaking from wooden frames. Watch for permanent indentations in foam models. The structural integrity must remain uncompromised.
Traction and slippage testing is equally critical. Studio floors vary widely in texture and material. A sliding unit poses a massive safety hazard. You must test the base grips extensively.
Test the unit on polished hardwood floors first.
Move the unit to rubberized gym flooring next.
Finally, test it on standard studio carpet.
Have an instructor perform explosive movements during these tests. The unit must remain entirely static. If it slips even an inch, the base grips require improvement. You may need to request stickier rubber pads from the manufacturer.
Do not forget the hygiene and maintenance simulation. Studios clean equipment multiple times a day. You must simulate this chemical exposure rapidly. Wipe down the sample with standard hospital-grade studio cleaners. Do this twenty times in a single afternoon. Observe the material reaction closely. Watch for any sudden material discoloration. Feel the vinyl for abnormal hardening or cracking. Inspect foam surfaces for chemical degradation. High-quality materials resist harsh cleaners effortlessly. Inferior materials will peel, fade, or become sticky.
Floor Surface Type | Required Base Material | Slippage Tolerance | Testing Action |
|---|---|---|---|
Polished Hardwood | High-friction silicone pads | Zero movement | Explosive step-ups |
Rubber Flooring | Textured rubber feet | Minimal shifting | Heavy side-bending |
Standard Carpet | Velcro grips or spiked feet | Zero movement | Dynamic roll-overs |
A perfect sample means nothing without manufacturing consistency. You must ensure the "golden sample" matches the final bulk order. Many buyers receive a flawless sample but terrible bulk products. You must establish strict sample-to-production consistency protocols. Draft comprehensive manufacturing contracts early. Demand a signed "first article inspection" agreement. This legally binds the manufacturer to match the sample exactly. Take detailed macro photographs of the approved sample. Keep the physical sample locked in your office for comparison.
Supply chain transparency is a mandatory evaluation metric. Choosing a reliable spine corrector supplier requires careful documentation checks. Request their CE and ISO manufacturing certifications upfront. Verify these certificates through official databases. Evaluate their material sourcing policies thoroughly. They must prove the use of non-toxic, eco-friendly materials. Off-gassing toxic fumes in a closed studio is unacceptable. Discuss their standard lead times transparently. Delays disrupt your studio opening schedules drastically.
Finally, assess warranty and defect resolution policies. A trustworthy manufacturer stands behind their product confidently. Review their stated return policies carefully. Clarify the exact replacement terms for structural failures. Who pays for the return shipping on a cracked barrel? How quickly do they dispatch replacement units? You must codify these details before signing any purchase orders. Clear communication prevents costly legal disputes later. Partnering with a transparent supplier guarantees long-term operational success.
Comparing a spine corrector sample is a vital exercise in risk mitigation. A rigorous physical test protects your clients effectively. It also protects your bottom line from unexpected replacement costs. You must evaluate biomechanics, material density, and supplier reliability systematically. Never skip the dynamic load testing phase. True quality only reveals itself under heavy pressure.
Your next steps require immediate action. Create a standardized scorecard based on these criteria today. Request detailed spec sheets from your shortlisted manufacturers immediately. Execute every physical test outlined above meticulously. Compare the data objectively before signing a final purchase order. A disciplined approach guarantees you acquire durable, safe, and highly functional studio equipment.
A: Focus on dimensions accommodating average adult heights securely. Prioritize high-density materials like firm EVA/EPP or solid wood cores. You must demand non-slip, commercial-grade upholstery. These specifications ensure maximum durability under heavy daily use.
A: Yes. High-density Expanded Polypropylene (EPP) is highly durable, lightweight, and resistant to deformation. It handles high-volume use excellently. However, it lacks the traditional aesthetic appeal of classic wood and vinyl designs.
A: Request their Quality Control (QC) documentation upfront. Ask for a "first article inspection" report before mass production begins. You must also clearly define acceptable defect tolerances directly in your purchase agreement.
A: Use the "thumb press and recovery" test manually. Apply sustained, heavy pressure to the apex with your thumb for 10 seconds. Release it quickly. The material should recover its original shape immediately without leaving any indentation.


